AI 創作
一張照片,生成九宮格角色參考圖
AI 生圖小技巧
用 AI 生成人物圖片時,是否經常遇到這些問題?五官變了、髮型走樣、每張都像不同人。這裡分享一個簡單的方法。
✕五官變了✕髮型走樣✕衣服不一致✕每張都像不同人
步驟一
原理:先給 AI 一張「角色說明書」
先用一張清晰的人物照片,生成一張 3×3 九宮格角色參考圖。它能幫助 AI 理解同一個角色的樣貌、髮型、衣著、身形比例和配件——之後再生成其他場景時,角色一致性會穩定很多。
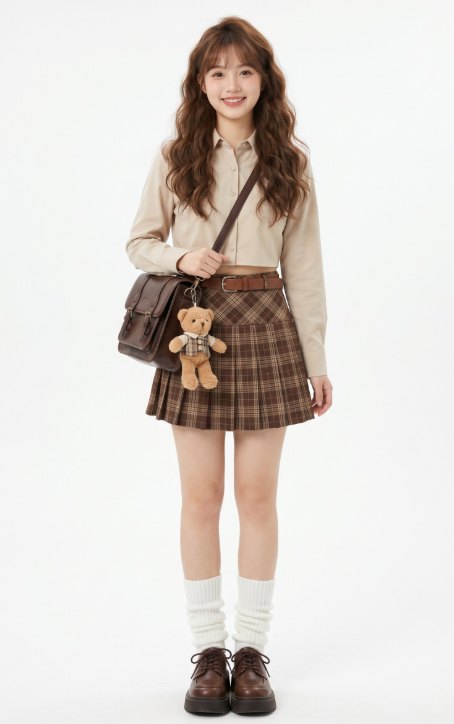
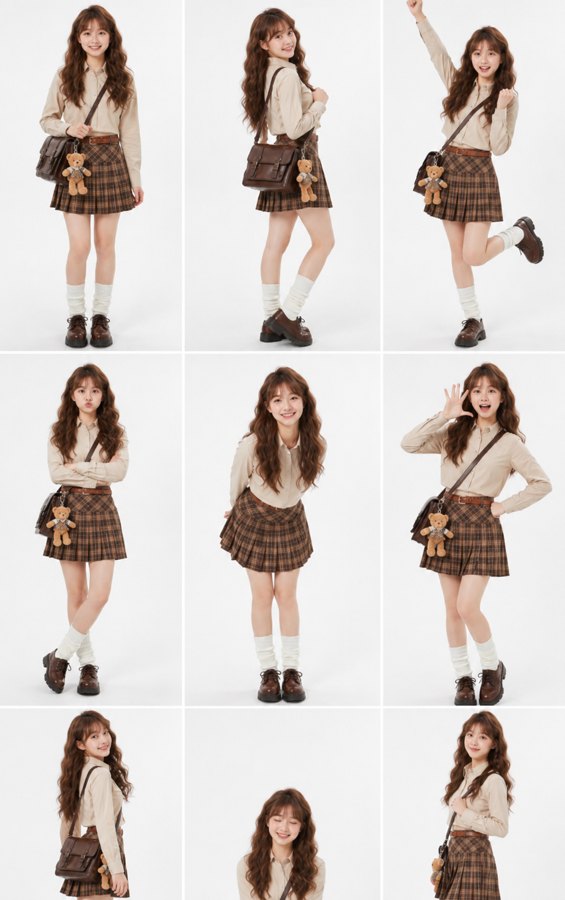
一張照片 + 一段 Prompt = 九宮格角色參考圖
- 1上傳一張清晰的人物照片到 AI 圖片工具
- 2複製下方的 Prompt
- 3貼上並生成
- 4取得一張 3×3 九宮格角色圖
- 5之後用這張圖做參考,生成不同場景、封面或短片素材
PROMPT
Nine different dynamic moments, angles, or expressions of the same character are arranged on a single canvas in a standard 3x3 grid.

The same character must remain visually consistent across all nine panels, including facial features, hairstyle, outfit, body proportion, and accessories.

Each panel shows a different pose, camera angle, expression, or body movement, like a character design showcase or cosplay photography collection.

Use a clean studio background, such as pure white, light gray, or soft neutral gray, to avoid distractions and highlight the character clearly.

The lighting should feel like professional commercial photography, with clean shadows, clear silhouette, and detailed rendering of the outfit, body language, and props.
按「一鍵複製」,或直接長按文字選取全部
合理期望
它未必一次就完美
但很適合作為角色一致性的第一步。之後想做同一個人物的不同表情、姿勢、封面圖或影片素材,都會比較容易保持同一個樣子。
把你的靈感,
交給更懂你的一首歌。
AI 生圖小技巧・由 Paul 分享。
Paul & Cami @ Soul New Energy 與你分享 ✨